2. Computer Aided Design (CAD)#
This week, I learned a lot of things, namely:
-
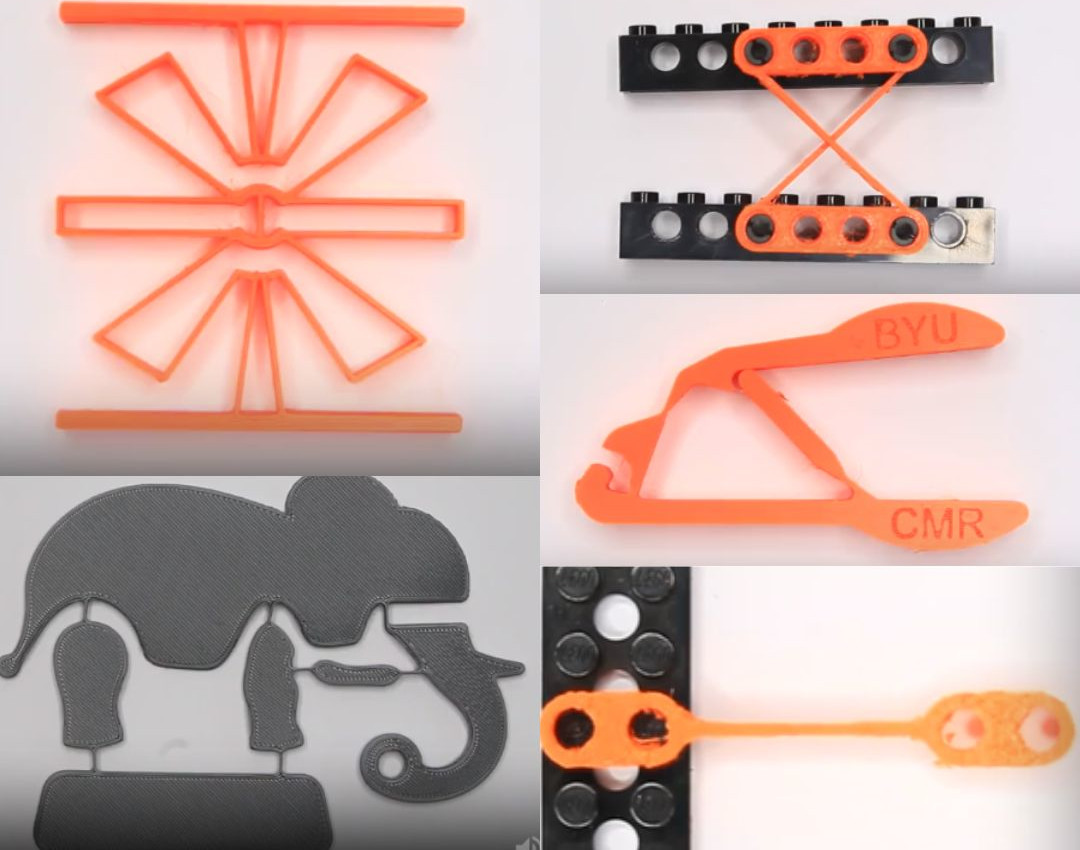
What is a Compliant Mechanism?
-
How to work with 3D softwares, in particular with OpenSCAD
-
Code licenses
1. What is a Compliant Mechanism?#
You can learn more about compliant mechanisms here
1.1. Compliant Mechanisms in Medicine#
I was curious about how I could apply the ‘power’ of compliant mechanisms in my field of interest, so I investigated a bit about this topic. Compliant mechanisms are changing the field of medicine for the best by using flexible materials to achieve movement without traditional joints. These innovative designs enhance various medical devices, making them more precise and reliable. For example, surgical instruments, like flexible grippers, allow surgeons to perform delicate procedures with greater control.
2. 3D tools#
For me, to work with 3D programs wasn’t a big deal! In my bachelor I learned how to use FUSION 360, 3D SLICER and other programs of AUTODESK. So, as I was familiar with these softwares, I decided to do my work with OpenSCAD in order to learn more about other realities. To install OpenSCAD on my computer I used this link.
2.1. OpenSCAD? What is it for?#
OpenSCAD is a powerful open-source software application used for creating 3D models through programming. Unlike traditional CAD tools that rely on graphical interfaces, OpenSCAD uses a scripting language, allowing users to define their models with precise mathematical descriptions.
2.2. Main Functionalities#
To learn how to use OpenSCAD I read this page that was very usefull! At first, I tried out the most important tools and functions of OpenSCAD to better understand how this software works.
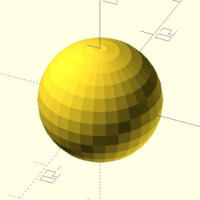
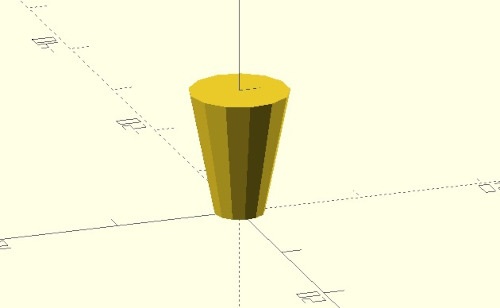
Basic Building Blocks
cube([10,10,10],center=true);

sphere(r=10);
cylinder(h=10, r1=2, r2=4);
Transformations
// move a cube 10 units along the x-axis and 5 units along the Y-axis
translate([10,5,0]) {
    cube([5,5,5]); // creates a cube with dimensions 5x5x5
}

// rotate a cube 45 degrees around the z-axis
rotate(0,0,45) {
    cube([5,5,5,]); // creates a cube with dimensions 5x5x5
}
Operations
// create a hole in a cube using difference
difference() {
    cube([10,10,10]); // creates a cube with dimensions 10x10x10

    translate([2,2,2]) { //subtract a smaller cube to create a hole
        cube([6,6,6]);
    }
}

// combine two objects using union
union() {
    cube([10,10,10]); // create a cube

    translate([5,5,10]) { // create a sphere and move it on top off the cube
        sphere(r=5);
    }
}
3. My Project - LEGO FlexLink#
I saw a lot of examples on this page and also by searching on the internet. I didn’t understand the purpose and the most important criteria that my object had to fulfill. So, I decided to make an object different from the examples but at the same time keep it simple.
1.Parameters: I started to define parameters. That is something very important and characteristic of OpenSCAD. Therefore, I am able to change the size and other dimensions of my object by just making one change.
// Parameters
d_hole=4.8;
h=3.2;
w=8;
fn=50;
tick=1;
2.Functions: I defined three functions. One to create the holes in the object, for this I used cilinders with specific dimensions from LEGO objects. To create the object I subtracted four cilinders from the cube. Finally, I created a function for the band that joins the two cubes with holes.
module hole() {
cilinder(h=h,d=d_hole,$fn=fn);
}
module brick() {
difference() {
cube([2*w,2*w,h]);
for (x = [0,w]) {
for (y = [0,w]) {
translate([x+w/2, y+w/2, 0])
hole();
}
}
}
}
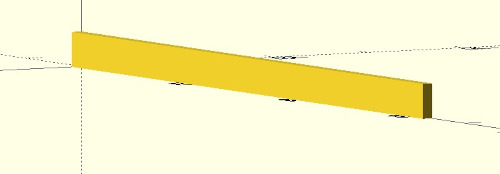
module band() {
cube([tick,8*w,h]);
}
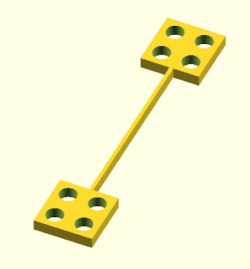
3.Union: I used the union function to connect the three pieces and thus, form an object.
module flexlink() {
    union() {
       brick();
       translate([0,8*w,0])
          brick();
       translate([w,2*w,0])
          band();
    }
}
flexlink();
4. LEGO Flexlink - Classmate code#
In order to complete my Flexlink Kit I looked at the code from Juliette Debure.
// File : Lego_Test_Module2_JD.scad

// Author : Juliette Debure

// Date : 24 octobre 2023

// License : Creative Commons Attribution-ShareAlike 4.0 International [CC BY-SA 4.0](https://creativecommons.org/licenses/by-sa/4.0/)

$fn = 70;


cube([70,10,10], center = true);
cylinder(h = 8 , d = 4.8);
translate([10,0,0]){
    cylinder(h = 8 , d = 5);
    translate([10,0,0]){
        cylinder(h = 8 , d = 5.2);
        translate([10,0,0])
            cylinder(h=8 , d = 5.4);
    }
}

translate([-10,0,0]){
    cylinder(h = 8 , d = 4.6);
    translate([-10,0,0]){
        cylinder(h = 8 , d = 4.4);
        translate([-10,0,0])
            cylinder(h = 8 , d = 4.2);
    }
}
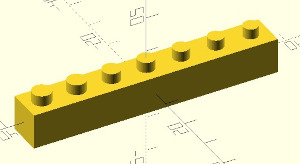
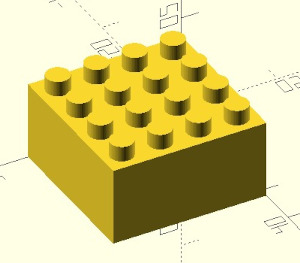
I modified her code to adapt the dimensions of the LEGO Flexlink that I made earlier.
// File : classmate.scad
// Author : Matilde Gonçalves
// Date : 20th november 2024
// License : Creative Commons Attribution-ShareAlike 4.0 International CC BY-SA 4.0
// Parameters
fn = 50;
h_cube = 16;
h_hole = 3.2;
d_hole = 4.8;
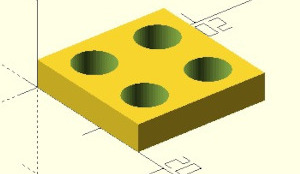
// Create the cube
cube([2 * h_cube, 2 * h_cube, h_cube]);
// Create the holes using loops
for (x = [4, 12, 20, 28]) {
for (y = [4, 12, 20, 28]) {
translate([x, y, h_cube])
cylinder(h=h_hole, d=d_hole, $fn=fn); // creates holes using the parameters defined previously
}
}
5. Code License#
Creative Common licenses are a set of free, flexible copyright licenses developed to make it easy for creators to share and allow others to use their work legally. The six main Creative Commons Licenses, from most to least permisssive are:
- CC BY: free to use, modify, and share (even commercially) with credit to the creator
- CC BY-SA: free to use and adapt with credit, but derivatives must use the same license
- CC BY-ND: free to share with credit, but no changes allowed
- CC BY-NC: free to use and adapt for non-commercial purposes with credit
- CC BY-NC-SA: free to use and adapt non-commercially with credit, and adaptations must use the same license
- CC BY-NC-ND: free to share non-commercially with credit, but no changes allowed.
I chose to licence my work with CC BY-NC because this one strikes a balance between encouraging free, open use for educational and personal project and protecting against commercial exploitation.
// file: friklink.scad
// Autor: Matilde Peralta Gonçalves
// Date: 14th october 2024
//License: Creative Commons Attribution-NonCommercial 4.0 Internacional CC BY-NC